Set up Youtube Studio: Camera, lighting & Co – Cheap at Amazon!
Make Youtube Studio yourself – How should the perfect YouTube Studio look like? What do you actually need to produce YouTube videos? Which camera do I use? Which microphone? Let’s take a closer look today at how to produce videos in your own studio and which technology you need! For our new e-learning online platform Confidence Club, but also for our model agency CM Models, we have always needed an area where you can record simple, small (and above all fast) videos for YouTube. Tutorial videos but also howto videos and instructions. Not only that, also for small PR videos such a space is always perfect: If you have new product presentations, ideas or even projects.
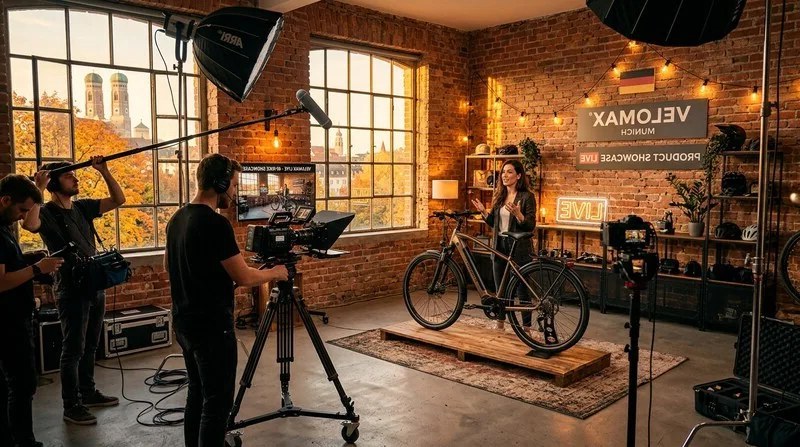
Set up YouTube Studio: DIY under 1000 Euro!
No matter when, at any time, the studio is wide and with just one click on the power strip the lights, camera, microphone and you’re ready to record! Such an own YouTube room is already luxury. I have fulfilled this little luxury last year! Now I can record a video at any time, immediately. Such a room not only brings “old” ideas to the implementation but also completely new concepts and projects. This is how we came up with new projects and our e-learning platform. It was already worth it, so I wanted to take you with me and show you how such a “studio” looks like, how it is built up, which technology you need and how much it costs! Especially the price plays a role for many people when they start with YouTube. Of course it makes a big difference if you blog as a private person or, as in our case, if you need a small studio.
Tip! Social Media Software & Learn Online: The latest tools, the best software and new: Online Courses for Social Media Managers. Automation of postings, newsletter marketing and learn new strategies online! Now on my Social Media Agency: Social Media Tool.
Studio, camera, light, microphone, memory cards – do it yourself guide
Studio and space: minimum 8 qm, better 20 qm
For Youtuber your own bedroom is enough, but if you want to produce videos for companies or for e-learning platforms, you need a little more space than 8 square meters. For a reasonably large studio I would recommend at least 15 square meters of space, even better 20 square meters. On the one hand, in the studio the tripod is placed, on top of it the camera, 4 daylights and the cables and ideally also microphone and audio cables. But chairs as also a big mirror are not wrong. All this must be taken into account and in the ideal case a possible complete darkening of the room. Why? Because of this, a constantly equal light situation can be guaranteed by daylight and abduction of the room.
Camera: Youtuber Cam, digital camera, system camera or SLR?
As far as cameras are concerned, there are definitely several recommendations.
Vlogs on the road with handy Legria X
It does not have to be the most expensive camera! We produce ourselves with different cameras, depending on the situation. Follow me around videos of bloggers or influencers for YouTube we make with our Canon Legria X camera. It’s perfect for blocking on the go, as it has a small screen integrated and an extremely good wide-angle lens. However, the camera is hard to get nowadays as it is no longer produced by Canon. What a pity! Nevertheless there are still some offers like here (picture) on Amazon where there are still a few available. As you can see on the small, rotatable screen, this handy camera is especially suitable for “Follow me around” videos in Vlogs. But for other shots we also have a second camera, a little bigger, a compact camera. Both cameras are also used in the studio when all the bigger ones are on the road on productions.

Studio e.g. with Canon 700D and successor 750D (tip!)
My recommendation, however, would be a reflex camera, as well as from Canon or Sony. With it you have a good image quality but also a good video quality. My Canon is a 750D, it has an integrated and tiltable screen, so I can look at myself while shooting, but also use the touch display to control all important functions without having to go behind the camera. Also here a tip, you will often stand alone in front of the camera, especially with tutorial videos, so you can coordinate everything yourself without wasting too much time of staff, also the concentration is higher. The Canon 750D is my favourite camera compared to other cameras, because you can get it in almost every wholesale and electronics store but also in online shops. Furthermore, many friends can get along with this camera and you can also get quickly necessary additional parts as well as batteries or permanent batteries which we will get on in a moment. From the price performance my recommendation among the cameras for YouTube and simple video production.

Tripod: Better heavy than light for stability
For tripods in video production, the most important recommendation is that your tripod should not be one of the lightest but also sufficiently heavy. If your tripod is too light, the risk of vibrations is too high, as well as the risk of the camera tilting, e.g. when changing lenses. When choosing a tripod, you should therefore pay attention to a high-quality material processing. The center of gravity should be able to be stretched far up, the heavier the lens is, especially the perspective from eye level is often important for the conversation. If the camera is then turned to a height of 180 m, the lens has to have a correspondingly wide stand but also guarantee the necessary stability as well as a low center of gravity. Here you can find a stable camera tripod.

Battery: Second battery in stock
A battery is a battery. Those who want to produce a lot need several batteries in stock, therefore, it is of course always recommendable to buy some spare batteries in the online shop and a suitable charger. If the camera is continuously running, as it is the case in video productions, a lot of energy resources are consumed. For a three-hour production one should have at least four batteries in stock. But since we work in a studio, there is a 4 Ingenious other solution, a permanent battery with a charging cable!
Permanent battery: continuous operation by power cable and battery adapter

How to use this permanent battery? The setup is super easy, the battery is constructed in the same way as a normal one, in the housing you can put the plug in and you have a small box that can be put directly into the camera. There, where the battery is normally located, there is now a small plastic box and from our camera comes a charging cable. We can now take it along our tripod and put it into the socket at the bottom. The camera is ready for use with the camera permanent battery 24/7.
Lens: Standard lenses are good enough!
Of course, the use of lenses is always debatable in professional circles! But for our video productions the city is enough. At that time I got a package for my credits with second, this one has been on camera for three years and gives me excellent results. So I can say that if you get a camera, the lenses on it are usually absolutely sufficient.

But what I – who likes it – can still recommend as an extension is a lens that allows you to take manual focus. What is the advantage? Let’s just think, you make a cereal product for Youtube and want it in the focus of the picture, while the rest is out of focus. Same goes for the moderator in the room – they are in focus, the rest is out of focus. Not every standard lens offers this manual, adjustable function. That’s why I added a high quality lens to my camera.
Microphone
There is already much more to say about the microphone for YouTube production. First of all, you always have the microphones integrated in the camera, these are absolutely sufficient but are not 100% recommended for recordings that are made inside rooms because of the sound. As a possible alternative there are always two good recommendations, on the one hand a directional microphone, but even better a clip-on microphone including transmitter.
Directional microphones
Directional microphones many people may know when watching TV productions. The microphone is mounted on a long rod and is always pointed at people. This captures the sound coming from a certain direction. But these microphones can also be switched to the whole sound of the environment. Both are good for productions outside of rooms, but difficult for our YouTube setting, because we don’t have a production team on location and no sound assistant to constantly reposition the microphone. Also, reverberation and sound waves are always captured by the room.

No matter if the microphone is focused or not, sound waves are permanently in the room and are refracted from everywhere. For perfect productions it is recommended to use a clip-on microphone. Matching with radio link. If there is more than one conversation partner on site, you should have a level meter to them. Let’s have a look at everything in detail.
Radio microphones or clip-on microphones have the clear advantage that they pick up the sound directly at the man. This makes the sound source much louder and sound waves much less significant. The sound is therefore clear and the voice is perfectly recorded without great interference effects. If you are recording as a single person, it is sufficient to have a single transmitter and receiver, like this one.
For two or more people in conversation, you should also get a receiver device where you can level the individual audio tracks. And then you get a single audio track in which all the different microphones are already levelled and thus have the ideal volume to work together.
But the single microphone for plugging in does not have to be expensive, here, it is enough to get a microphone for less than 10 €. There are different recommendations for this, one of them is this one.
Sound: foam covering opposite the speech source
Sound is one of the biggest enemies in video production, because once your set is recorded, it is difficult to re-sync it, which takes a lot of time. That’s why you should think about eliminating possible sound sources in advance. This can be changed by using a lapel microphone or by installing sound barriers or foam. This foam absorbs incoming sound waves and does not return them back into the room. Good insulation absorbs almost 90% of all panes. The sound insulation should always be aligned against the sound source so that the sound waves hit it directly and immediately. The sound insulation varies depending on the look and intensity. The more pointed and angular the foam is, the more it usually absorbs. Foam is therefore available in different thicknesses, from 1 cm up to 15 cm. For our productions it is sufficient to have a sound insulation at all at first, this increases the quality of each video and thus enhances the quality of each individual production. A very big added value in sound insulation.
Memory card: More is more! Large memory from the advantage
The one who likes to talk for a long time and thus ideally shoots several episodes or lessons or even shows in a single production series should get a sufficiently large memory card. With the current capacities in the area of HD film production companies, at least one memory card with 16 GB should be used. To avoid problems with storage space and capacity, it is advisable to buy a 64GB memory card, so that several productions can be collected on one SD card or, for example, additional screencasts can be made. Since the cost investment is not much higher for a memory card with more storage space, you should fall back on it. Instead of many small memory cards, because sometimes one can get lost, the data backup is a little easier, because it is more clearly arranged.

Continuous light: Softbox for nice light (min. 4 lamps)
Das Studio permanent light in a studio is very important, because depending on daylight cloudy or even sunshine, the lighting situation changes. Many don’t take this into account and have later cuts where it gets brighter or darker, which is very difficult to rework and only little to compensate, or the videos change their look with every new episode. To prevent this from happening, you should have a room that you can darken, for example with blinds. If you darken the room and use daylight lamps, the lighting situation and my mood is the same for every production. Furthermore, there are no disturbing shadows, e.g. with a single light source. Almost every room has such single light sources, because usually only one side is occupied by windows. To compensate for this, one uses daylight lamps that are positioned in such a way that one’s own shadows are no longer visible.

Daylight instead of dark rooms
The magic word is daylight lamps. Daylight lamps have a relatively bright light that comes from a central light, similar to the sun. If you build up 4 light sources, which fall on the speaking person from different angles, you switch off all shadows. Daylight lamps are relatively cheap and can be bought in a set for under 100 €.
Mirror: For styling, make-up and Co.
A little secret tip! Buy yourself a big mirror! In the end, looks always play a part, whether it’s at dinner, the first time you get to know each other or online tutorials. The more professional the video is made, the more you get to watch. In our YouTube studio there is a 2.20 m mirror, where you can see everything from your feet to your head, does your hairstyle fit, is there still something between your teeth or is your tie crooked? All these questions can be answered all the time, even if you are more emotional in the YouTube video and move more, you can always fix the look again.
Cables: audio, power, light and distributor
A good Youtuber studio includes not only the technical equipment but also the necessary cables to connect them together or to tap the power sources. I would always recommend to buy two distribution boxes with five sockets each and an on/off switch. If no video production is running, any technical equipment can be switched off with two clicks. When you start, you only have to click your foot two times and everything is running. To our power strip we need an audio jack cable, which we need to route the audio track from the microphone receiver or the recording device Wehdem Pegler to the camera. To avoid the cable from kinking or wearing out on the camera, you should buy a 90° angle, so that the cable can be led down cleanly.
Table: storage and trust option
The last important technical aid is a simple table. The table serves either as a notebook storage surface or as a storage area for texts and scripts. It is a small detail but it should be thought of! The table should always be space-saving but at least offer space for two DIN A4 pages next to each other. So you can easily turn the pages of scripts or even place a notebook.
Notebook: Important is a lot of RAM (HD editing)
Recommending a perfect notebook for video editing is of course relatively difficult, since there are extremely many providers. Make sure that you have enough memory and that it is a new notebook, processing power is very important for video production, because you work with HD video material and programs like Adobe Premiere need quite a lot of resources when you are in video editing. The more video tracks you create, e.g. text overlays, text fade-ins or webs, the more capacity your notebook needs. Therefore you should have at least 8GB of RAM and a fast processor. For the many pictures and video material you should buy a computer with a second hard disk with at least 100 GB of storage space. Create a clean folder, so that you can delete all projects immediately after the video editing.

Many keep their video material forever and buy hard disk and hard drive, nobody needs that! Put your video neatly in a folder and once the video is produced, delete the folder and the video editing project file.

I am currently working on a Acer Zenbook. But many friends also like to work with Apple MacBook.
Software: Adobe Premiere
Adobe Premiere is available today instead of in a large expensive package, in the smart monthly cloud version. Of course, there are many free video editing options available today, most computers already have their own small program but also all smartphones. Here you can already realize a lot! But if you want to produce professional videos and image films, you should use a professional software and Premiere. Obi Premiere is available in the cloud for just a few Euros per month and is therefore worth its weight in gold for every video production! With Adobe Premiere you can not only cut videos but also make all text insertions light corrections but also audio corrections. You can run the videos faster and slower to create slow motion effects but also export them to different networks like YouTube, Vimeo and Instagram or Facebook. Of course you can also use it in the classic HD forum or any other video output form.
Picture editing: Adobe Photoshop
For the appropriate image editing you can remember direct Photoshop, because no matter if it’s logos or graphics, e.g. statistics that are displayed or even pictures or screenshots, for all this you will need a software for image editing. Since we have already been at Adobe Premiere, I would add Adobe Photoshop directly to this package. Just like Photoshop is easy to learn and also in my video tutorials numerously represented! You can find more here in the Photoshop Tutorial.
Effects: Adobe AfterEffects or Cinema 4D *advanced
If you want to create special effects and 3D effects, you should also use Adobe After Effects. With Adobe After Effects you can create animations and effects. But here’s a little care, because Adobe After Effects is difficult to learn in comparison to Premiere and needs a lot of time until you understand the complex processes so that you can produce your own animations in a way that they are profitable, also from the time of implementation. For video editing, it is therefore sufficient to use free programs or, for more professional editing, Adobe Premiere.
Screencast: Record your own desktop
If you occasionally produce a screencast in which your own screen is recorded, there are numerous free programs available. If you only need one recording and no special cuts or features, here is a recommendation for recording your own desktop and screen:
- Ocam Download: Record screen – free of charge
Your very own YouTube studio
So you have your secret recipe for a perfect YouTube studio! For less than 1000 € you are guaranteed to have the perfect recordings! If you already own your own notebook and don’t have to invest extra, you’ll get a return of investment very quickly.
How many videos can you produce in one day?
In a single day you can easily produce and edit three or four videos completely finished. Because everything in the studio is relatively automated and you don’t have to worry about the technology, everything can be realized and produced very quickly. If you can talk relatively fast and freely, you will also have little editing work and can get to the export market relatively quickly. Production is extremely fun, once you have found the flow, you can really produce on the assembly line. Once you’ve found the flow, you can really produce on the assembly line. Once you’ve got the perfect layout for your own video in Adobe Premiere, so that the video, video intro and car are ready to go. Have fun building your own YouTube studio and good luck with your production! If you have any questions, just drop me a line in the comments.
Good luck!
Discord vs YouTube: Video marketing, advantages and differences
YouTube marketing strategy: YouTube channel, SEO, advertising and click prices

Amazon Music Doc: Now online!!! Multi Channel Marketing
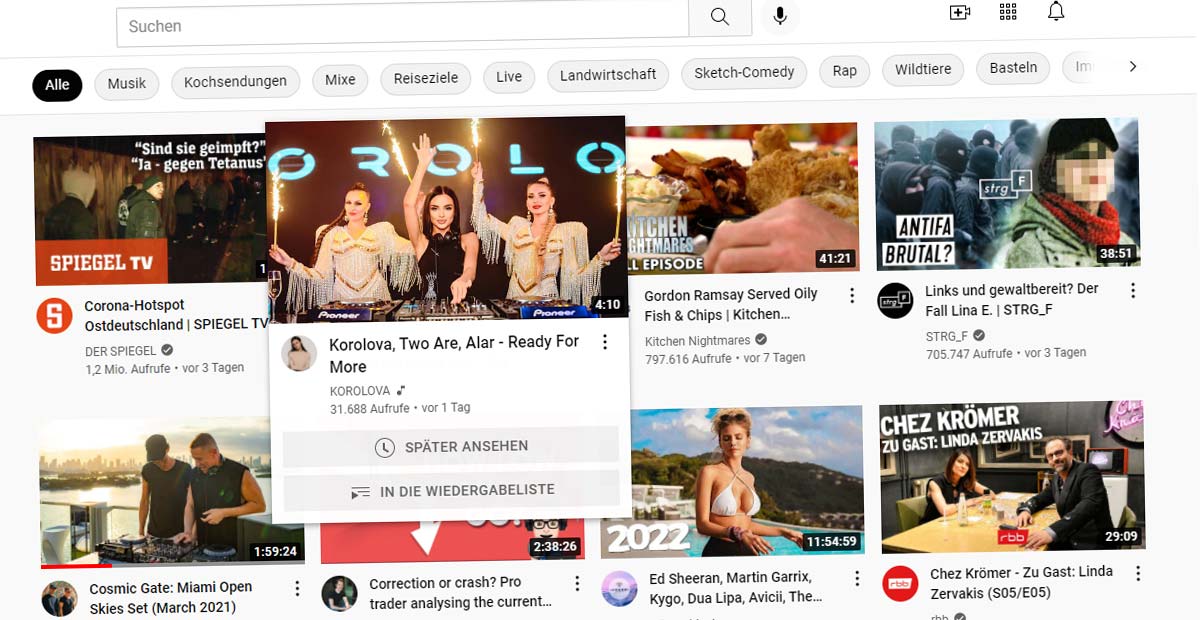
YouTube Thumbnail now with Popup! Thumbnail XL - New on YouTube

YouTube Ads Agency: Place ads

YouTube Evergreens: Concept, Idea, Learning from the Most Successful Videos!


 4.9 / 5.0